Safety Precautions
Always read and understand the manual before operating the Craftsman snowblower. Wear protective gear, including gloves and eyewear. Avoid loose clothing and jewelry. Never leave the snowblower unattended while running. Keep children and pets away; Ensure proper ventilation to avoid carbon monoxide buildup. Follow all safety rules and instructions to prevent accidents and injuries.
- Read the manual thoroughly before use.
- Wear appropriate protective clothing and gear.
- Avoid hazardous situations and loose items.
- Keep the area clear of bystanders.

1.1 Importance of Reading the Manual

Reading the Craftsman snowblower manual is essential for safe and effective operation. It provides critical safety precautions, operating instructions, and maintenance tips. Understanding the manual ensures proper use of controls, prevents accidents, and extends the equipment’s lifespan. Familiarize yourself with safety rules, assembly steps, and troubleshooting guides before operating. Neglecting to read the manual may lead to improper use, void warranty, or cause injuries. Always refer to the manual for guidance on handling fuel, protective gear, and avoiding hazards. It is your first step toward mastering your snowblower’s functionality and ensuring optimal performance.
- Ensures safe and proper operation.
- Provides critical safety and maintenance guidance.
- Helps understand controls and functionality.
- Prevents accidents and equipment damage.
1.2 Handling Fuel Safely
Handling fuel for your Craftsman snowblower requires careful attention to safety. Always use the recommended type of fuel as specified in the manual. Store fuel in approved containers, away from open flames or sparks. Never refuel while the engine is running or hot. Ensure the area is well-ventilated to prevent fume buildup. Avoid overfilling the tank to leave space for expansion. Keep fuel out of reach of children and pets. Spillages should be cleaned immediately to prevent accidents. Proper fuel handling ensures safe operation and prevents fire hazards. Always follow the manual’s guidelines for fueling procedures.
- Use only recommended fuel types.
- Store fuel in approved, sealed containers.
- Never refuel a hot or running engine.
- Keep fuel away from open flames and sparks.
1.3 Protective Gear and Clothing
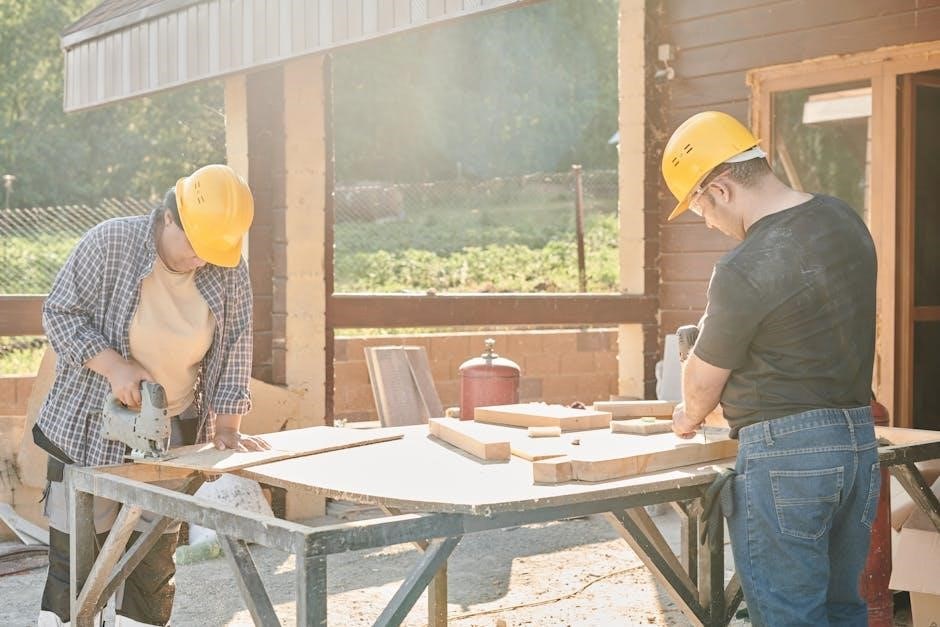
Wearing proper protective gear and clothing is essential when operating a Craftsman snowblower. Always wear safety glasses or goggles to protect your eyes from debris. Use insulated, waterproof gloves to maintain grip and hand protection. Choose sturdy, waterproof boots with good traction to prevent slipping. Dress in layered, breathable clothing to stay warm and avoid overheating. Avoid loose clothing or jewelry that could get caught in moving parts. Ensure all clothing is tightly secured. Proper protective gear minimizes the risk of injury and ensures safe operation in cold, snowy conditions.
- Wear safety glasses or goggles.
- Use insulated, waterproof gloves.
- Choose sturdy, waterproof boots;
- Dress in layered, breathable clothing.
1.4 Avoiding Hazardous Situations
Avoiding hazardous situations is crucial for safe snowblower operation. Never operate the machine in enclosed spaces, as carbon monoxide buildup can be deadly. Keep the area clear of obstacles, wires, and bystanders. Avoid blowing snow near windows, doors, or people. Refrain from using the snowblower on steep slopes or unstable ground. Never touch hot engine parts or attempt to clear clogged discharge chute while the machine is running. Stop the engine before performing any maintenance or adjustments. Be cautious of icy or uneven surfaces to prevent slips or tip-overs. Always ensure good visibility and avoid operating in darkness.
- Operate in well-ventilated areas.
- Keep bystanders and pets away.
- Be cautious on uneven terrain.

Assembly and Installation

Unpack and inventory all parts carefully. Follow the manual for step-by-step assembly, ensuring all bolts are tightened securely. Adjust handlebars and discharge chute as needed. Double-check blade engagement and drive systems. Refer to the manual for specific torque settings and diagrams.
2.1 Unpacking and Inventory
Begin by carefully unpacking the snowblower and verifying all components against the parts list in the manual. Check for any damage or missing items. Organize the hardware and accessories in a clean, dry workspace. Compare each part with the inventory list to ensure completeness. Pay attention to labels and packaging to avoid confusion. If any parts are missing or damaged, contact customer service immediately. Use the provided diagrams to identify and sort components for easier assembly. Proper organization ensures a smooth setup process.
- Unpack all components carefully;
- Verify against the parts list.
- Check for damage or missing items.
- Organize parts for easy access.
2.2 Step-by-Step Assembly Instructions
Begin by attaching the handles to the snowblower chassis using the provided bolts. Tighten securely according to the torque specifications in the manual. Next, install the discharge chute by aligning the mounting brackets and securing with screws. Attach the auger housing to the front of the unit, ensuring proper alignment with the engine. Connect the control cables to the chute and auger, making sure they move freely. Finally, install the belt and adjust its tension as instructed. Refer to the diagrams for precise alignment and tightening procedures to ensure safe and proper assembly.
- Attach handles to the chassis.
- Install the discharge chute.
- Mount the auger housing.
- Connect control cables.
- Install and tension the belt.
2.3 Initial Setup and Adjustments
After assembly, ensure all bolts and screws are tightened to the specified torque. Adjust the discharge chute to your preferred angle and distance. Check the auger for proper rotation and alignment. Set the skid shoes to the appropriate height for your surface. Lubricate moving parts as outlined in the manual. Test the controls to ensure smooth operation. Make any necessary adjustments to the cable tensions and belt alignment. Finally, perform a trial run in a clear area to verify everything functions correctly before full operation.
- Tighten all bolts and screws.
- Adjust the discharge chute.
- Check auger alignment and rotation.
- Set skid shoe height.
- Lubricate moving parts.
- Test controls and make adjustments.

Operating the Snowblower
Engage the auger and controls smoothly. Navigate different snow conditions with care. Maintain steady progress and clear blockages promptly for optimal performance.
- Engage controls gradually.
- Adjust speed for snow depth.
- Clear blockages immediately.
3.1 Starting and Stopping Procedures
Read the manual for proper starting and stopping techniques. Ensure the area is clear before starting. Use the choke for cold starts and gradually adjust the throttle. Allow the engine to warm up briefly before engaging the auger. To stop, disengage the auger, reduce throttle, and turn off the engine. Always follow the recommended shutdown procedure to prevent damage. Never leave the snowblower running unattended.
- Start with choke for cold engine.
- Warm up engine briefly before use.
- Disengage auger before stopping.
- Follow proper shutdown steps.
3.2 Navigating Different Snow Conditions
Adjust the snowblower settings to match snow depth and type. For heavy, wet snow, reduce speed and use a lower gear. For light, powdery snow, increase ground speed. Avoid clogging by not overloaded the intake. Use skid shoes to protect surfaces on icy or gravel areas. For deep snow, clear in layers to maintain efficiency. Always maintain control and slow down on uneven terrain. Use the chute deflector to direct snow safely and avoid blowing snow toward people or windows.
- Match speed and gear to snow conditions.
- Use skid shoes on sensitive surfaces.
- Clear deep snow in layers.
- Adjust chute deflector as needed.
3.4 Adjusting the Snowblower Settings
Adjust the chute deflector to control snow discharge direction. Use the chute angle adjustment to optimize throwing distance and accuracy. Set the auger speed based on snow conditions for efficient clearing. Ensure proper tire pressure for stability and traction on different surfaces. Refer to the manual for specific instructions on adjusting these settings to suit your needs. Proper adjustments ensure safe and effective snowblower operation.
- Adjust the chute deflector for snow direction control.
- Set the auger speed according to snow conditions.
- Ensure proper tire pressure for traction.

Maintenance and Troubleshooting
Regular maintenance ensures optimal performance. Check for worn parts, lubricate moving components, and inspect the auger and chute. Address common issues like clogs or uneven snow distribution promptly. Store the snowblower in a dry place during winter, draining fuel to prevent degradation. Always refer to the manual for specific troubleshooting and maintenance schedules.
- Inspect and maintain parts regularly.
- Lubricate moving components as needed.
- Store properly during off-season.
4.1 Routine Maintenance Checks
Regular maintenance is crucial for optimal performance and longevity of your Craftsman snowblower. Inspect the auger and chute for damage or blockages. Check belts for wear and tear, replacing them if necessary. Lubricate moving parts, such as gears and hinges, to ensure smooth operation. Drain old fuel at the end of the season and replace it with fresh gasoline. Verify that all bolts and screws are tightened securely. Refer to the manual for specific maintenance schedules and recommendations tailored to your model. Proper upkeep prevents breakdowns and ensures reliable snow-clearing performance year after year.
- Inspect auger and chute for damage.
- Check belts for wear and replace as needed.
- Lubricate moving parts regularly.
- Drain and replace fuel seasonally.
- Tighten all bolts and screws.
4.2 Common Issues and Solutions
Common issues with your Craftsman snowblower may include a belt slipping or breaking, which requires inspection and replacement. The auger may stop turning due to blockages; clear debris promptly. If the chute isn’t directing snow properly, check for obstructions or adjust the chute angle. Fuel problems, like old or incorrect fuel, can cause startup issues; drain the tank and refill with the recommended fuel type. Regular maintenance, like lubricating gears and ensuring all parts are secure, helps prevent these issues. Refer to your manual for specific troubleshooting guides.
- Inspect and replace worn or broken belts.
- Clear blockages from the auger and chute.
- Adjust the chute angle for proper snow direction.
- Drain old fuel and use the correct fuel type.
- Lubricate moving parts and secure all components.
4.3 Winter Storage Tips
Properly storing your Craftsman snowblower during winter ensures longevity and optimal performance. Drain old fuel to prevent gumming and stale fuel issues, then add fresh, stabilized fuel. Clean the machine thoroughly, removing dirt and debris, especially from the chute and auger. Lubricate all moving parts to protect against rust and corrosion. Store the snowblower in a dry, well-ventilated area, away from direct sunlight. Cover it with a durable tarp to shield from dust and moisture. Regular maintenance before storage ensures it will be ready for the next snow season.
- Drain old fuel and add fresh, stabilized fuel.
- Clean the machine, focusing on the chute and auger.
- Lubricate all moving parts to prevent rust.
- Store in a dry, ventilated area, covered with a tarp.

Warranty and Customer Support
Your Craftsman snowblower is backed by a two-year limited warranty covering defects in material and workmanship when properly maintained. For assistance, contact customer service at 1-800-366-7278 or visit www.craftsman.com.
5.1 Warranty Coverage Details

The Craftsman snowblower is covered by a limited two-year warranty from the date of purchase. This warranty applies to defects in material and workmanship when the unit is properly maintained. If used for commercial or rental purposes, the warranty period is reduced to 90 days. Coverage excludes damage from misuse, lack of maintenance, or normal wear and tear. For more details, refer to the owner’s manual or contact customer service at 1-800-366-7278.
- Covers defects in material and workmanship for two years.
- 90-day warranty for commercial or rental use.
- Excludes damage from misuse or lack of maintenance.
5.2 Contacting Customer Service
For assistance with your Craftsman snowblower, contact customer service at 1-800-366-7278. Representatives are available to help with warranty claims, maintenance questions, and troubleshooting. You can also visit the official Craftsman website at www.craftsman.com for additional resources, including user manuals and parts diagrams. Ensure you have your model number ready for efficient support. Online chat and email options are also available for convenience.
- Call 1-800-366-7278 for customer support.
- Visit www.craftsman.com for online resources.
- Have your model number ready for assistance.
By following the guidelines in this manual, you can ensure safe and effective operation of your Craftsman snowblower. Proper maintenance and adherence to safety precautions will extend the life of your machine and optimize its performance. Refer to the warranty details for coverage information and contact customer service for any assistance. With regular care and attention, your snowblower will reliably handle winter conditions for years to come.
- Follow manual guidelines for optimal performance.
- Regular maintenance is key to longevity.
- Utilize warranty and customer support when needed.