
Flip top workbench plans offer a versatile and space-saving solution for workshops. These designs combine functionality with efficiency, providing dual-purpose surfaces for tools and work. Popular among DIY enthusiasts, they often include detailed step-by-step guides, materials lists, and 2D diagrams, making them accessible for all skill levels. Whether you’re a professional or a hobbyist, flip top workbench plans are a great way to optimize your workspace and enhance productivity.
Overview of Flip Top Workbenches
A flip top workbench is a versatile woodworking solution that combines a sturdy work surface with tool integration. Designed for efficiency, it features a rotating or hinged top that allows easy switching between tools like table saws and miter saws. These workbenches are ideal for small shops, offering space-saving functionality and customizable layouts to meet specific workshop needs.
Benefits of Using a Flip Top Workbench
A flip top workbench offers exceptional versatility and space efficiency, ideal for workshops of all sizes. It allows seamless transitions between tools, enhancing workflow and productivity. Durable and customizable, these workbenches adapt to specific needs, providing a sturdy surface for various tasks. They are cost-effective and optimize workshop organization, making them a practical choice for woodworking enthusiasts and professionals alike.
Design Considerations for Flip Top Workbenches
Design considerations for flip top workbenches focus on size, layout, and material choice to ensure durability and functionality. Proper planning ensures optimal performance and longevity.
Choosing the Right Size and Layout
Measure your workspace to determine the ideal size and layout for your flip top workbench. Consider the tools you’ll use most, such as table saws or miter saws, to ensure proper fit. The design should accommodate both tool integration and a functional work surface. A layout with recessed areas for hardware and U-shaped holes for smooth transitioning mechanisms ensures practicality and efficiency.
Space-Saving Features and Versatility
Flip top workbenches are designed to maximize space efficiency, offering dual-purpose surfaces for tools and work. The flip mechanism allows seamless transitions between functions, while modular designs enable customization. These workbenches are ideal for small workshops, as they minimize footprint while providing ample functionality. Versatility is enhanced with features like recessed areas for hardware and portability options, ensuring adaptability to various projects and tools.

Materials and Tools Needed
Flip top workbench plans require 2×4 lumber, plywood, and hardware like eyebolts and washers. Tools include table saws, drills, and jigsaws for precise cuts and assembly.
Essential Lumber and Hardware Components
Flip top workbench plans typically require 2×4 lumber for the frame and bracing, along with 3/4-inch plywood for the work surfaces. Ripping 2x4s to 3-1/4 inches wide is common for the top frame. Hardware includes eyebolts, fender washers, star knobs, and hex bolts for secure locking mechanisms. Additional materials like steel pipe or solid shafts may be needed for stability and smooth operation of the flip top feature.
Tools Required for Construction
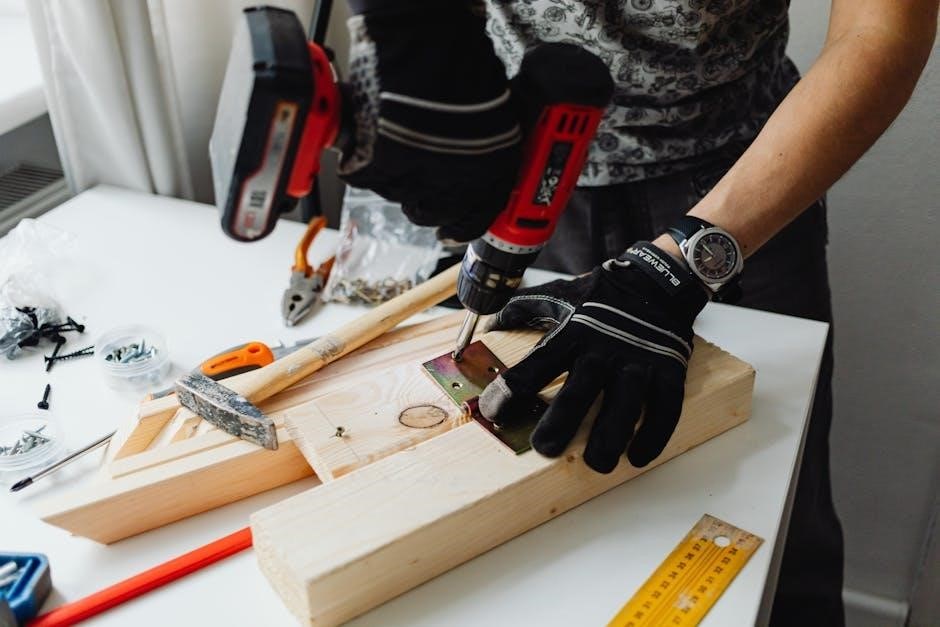
Table saw or circular saw is essential for ripping plywood and lumber to precise widths. A jigsaw helps in cutting U-shaped holes for the locking mechanisms. Drills are needed for creating holes for bolts and screws. Impact wrenches or screwdrivers are necessary for tightening hardware. Sandpaper and clamps are crucial for smoothing and holding pieces during assembly. These tools ensure accurate and efficient construction of the flip top workbench.

Step-by-Step Construction Guide
Start by assembling the cabinet and frame, ensuring precise measurements. Next, attach the flip top platform, integrating locking mechanisms for secure positioning. Finally, install hardware and test the smooth transition of the flip top to ensure optimal functionality and durability.
Assembling the Cabinet and Frame
Begin by assembling the cabinet, ensuring all components are squared and secure. Measure and mark the exact centers of the cabinets on both sides for precise alignment. Drill 3/4-in. holes and use a jigsaw to create U-shaped cuts, allowing the flip top to fit snugly. This step ensures stability and proper fitment of the workbench components, forming the foundation for the flip top mechanism.
Building and Attaching the Flip Top Platform
Construct the flip top platform by ripping 2x4s to 3⅓4; wide for framing and bracing. Cut plywood sheets to the desired width, ensuring a 3/8; recess for barrel locks. Assemble the platform using screws and wood glue, then attach it to the cabinet frame. Use a jigsaw to square off edges for smooth operation. Proper alignment and secure fastening are crucial for a stable and functional flip top mechanism.

Installing Hardware and Mechanisms
Install locking hardware, including eyebolts and star knobs, to secure the flip top in place. Transition mechanisms ensure smooth flipping, while proper alignment and secure fastening guarantee stability and functionality.
Locking Systems for Secure Positioning
A reliable locking system is crucial for maintaining the flip top’s stability. Eyebolts, fender washers, and star knobs are commonly used to secure the top in both flipped and flat positions. Ensure hardware is tightly fastened to prevent movement and wobbling, providing a safe and sturdy work surface for various tasks and tool operations.
Smooth Transition Mechanisms for the Flip Top
Smooth transition mechanisms ensure the flip top operates effortlessly between positions. Hinges or pivot points are crucial for seamless rotation, while precise hole drilling and hardware alignment prevent wobbling. A solid shaft or steel pipe can act as the main axis, allowing the top to flip and lock securely in place, ensuring stability and ease of use during transitions;

Customization and Additional Features
Customize your flip top workbench with tool mounts, storage compartments, and aesthetic enhancements. Add durability with finishes or integrate lighting for improved functionality, making it tailored to your needs.
Integrating Tool Mounts and Storage Solutions
Enhance your flip top workbench by integrating tool mounts and storage solutions. Mount power tools like miter saws or planers on one side, while the flip top provides a smooth work surface. Add drawers, shelves, or compartments to store accessories, keeping them within easy reach. These features maximize space efficiency and ensure your tools are organized and accessible, making your workflow more efficient and enjoyable.
Enhancing Durability and Aesthetics
Ensure your flip top workbench is both durable and visually appealing by using high-quality materials and finishes. Apply a protective sealant to the wood to withstand heavy use and environmental factors. Consider adding a decorative edge or paint to enhance its appearance. Incorporating sturdy hardware and smooth mechanisms will also contribute to its longevity and professional look, making it a standout piece in your workshop.

Flip Top Workbench Plans PDF Availability
Comprehensive flip top workbench plans are readily available as digital PDF downloads. These detailed guides include step-by-step instructions, diagrams, and materials lists for easy construction.
Where to Find Comprehensive Digital Plans
Comprehensive flip top workbench plans are available as digital PDF downloads on platforms like Etsy, woodworking websites, and forums. These plans often include detailed instructions, 2D diagrams, and materials lists. Popular sources offer affordable options, such as the Heavy Duty Workbench Plans on Etsy. Ensure the plans are tailored to your needs for tools like table saws or miter saws, and check for step-by-step guides and clear measurements.
Key Features of a Good PDF Plan
A good flip top workbench PDF plan should include clear, detailed instructions with step-by-step guides. Look for 2D diagrams, precise measurements, and a comprehensive materials list. The plan should also cover hardware installation and customization options. Additionally, it should provide a shopping list and cut list for efficiency. Ensure the plan is well-organized and easy to follow, catering to both beginners and experienced woodworkers.

Safety Tips and Best Practices
Always wear safety gear like gloves and goggles when cutting or drilling. Ensure proper lifting techniques to avoid injury. Keep loose clothing tied back and long hair secured. Maintain a clean workspace to prevent accidents; Regularly inspect tools for sharpness and damage. Follow manufacturer guidelines for hardware installation and tool operation.
Ensuring Stability and Safety During Use
Ensure the workbench is placed on a level surface and secure it to prevent shifting. Tighten all bolts and locking mechanisms before use. Maintain a clean workspace to avoid tripping hazards. Avoid overloading the flip top to prevent instability. Always use proper lifting techniques when moving tools or materials. Regular inspections of hardware and mechanisms are crucial for sustained safety and functionality.
Precautions for Construction and Assembly
Wear safety goggles and gloves during assembly to protect against debris and tool mishaps. Ensure all cuts are precise to avoid misalignment of components. Use clamps to secure pieces before drilling or fastening. Double-check hardware placement, especially for locking mechanisms, to prevent operational issues. Follow the plan’s instructions meticulously to avoid structural weaknesses. Test all moving parts thoroughly before first use.

Maintenance and Upkeep
Regular inspection and cleaning ensure longevity. Check hardware for wear and tighten as needed. Protect the surface from spills and abrasions for optimal performance and durability.
Regular Maintenance for Longevity
Regular maintenance is crucial to ensure your flip top workbench remains durable and functional. Inspect all hardware for wear and tighten loose connections. Clean the surface regularly to prevent dust and debris buildup. Apply protective finishes to prevent damage from spills or abrasions. Lubricate moving parts, such as hinges and locks, to ensure smooth operation. Address any alignment issues with the flip top to maintain proper functionality and prevent uneven wear.
Troubleshooting Common Issues
Common issues with flip top workbenches include alignment problems or wobbling. Check the hinge and locking mechanisms for proper adjustment. If the top doesn’t lock securely, inspect the barrel locks or eyebolts for wear. Ensure the frame is level and tighten any loose bolts. Lubricate moving parts if they feel stiff. Addressing these issues promptly will maintain the workbench’s functionality and extend its lifespan.
Building a flip top workbench is a rewarding project that enhances workshop efficiency. With detailed PDF plans, anyone can create a functional and versatile workspace solution.
Final Thoughts on Building a Flip Top Workbench
Constructing a flip top workbench is a fulfilling project that combines creativity with practicality. By following detailed PDF plans, you can create a customizable, space-efficient workstation. The process involves assembling cabinets, attaching the flip top, and installing hardware for smooth operation. With patience and the right tools, you’ll enjoy a durable, versatile workbench that meets your specific needs and enhances your workshop’s functionality.
Encouragement to Start Your Project
Embrace the opportunity to build your own flip top workbench using comprehensive PDF plans. This project is ideal for DIY enthusiasts, offering a chance to create a functional and customizable workstation. With clear instructions and essential materials, you can bring your vision to life. Start your journey today and enjoy the satisfaction of crafting a durable, versatile workbench tailored to your needs.