
The Honeywell TH5220D1003 is a non-programmable digital thermostat from the FocusPRO 5000 series, offering 2 heat and 2 cool stages. It features universal compatibility, a backlit display, and flexible wiring options, making it a reliable and energy-efficient solution for various HVAC systems.
1.1 Overview of the Honeywell TH5220D1003 Model
The Honeywell TH5220D1003 is a non-programmable digital thermostat designed for 2 heat and 2 cool systems. It belongs to the FocusPRO 5000 series, known for its universal compatibility and user-friendly interface. Featuring a backlit display, this model offers reliable temperature control and energy efficiency, making it a versatile solution for residential HVAC systems.
1.2 Key Features and Benefits
The Honeywell TH5220D1003 offers a large, backlit display for easy readability. It supports 2 heat and 2 cool stages, ensuring precise temperature control. Universal compatibility with most HVAC systems makes installation straightforward. The thermostat also features flexible wiring options and energy-efficient operation, providing reliable performance and cost savings. Its durable design ensures long-term reliability in various home environments.

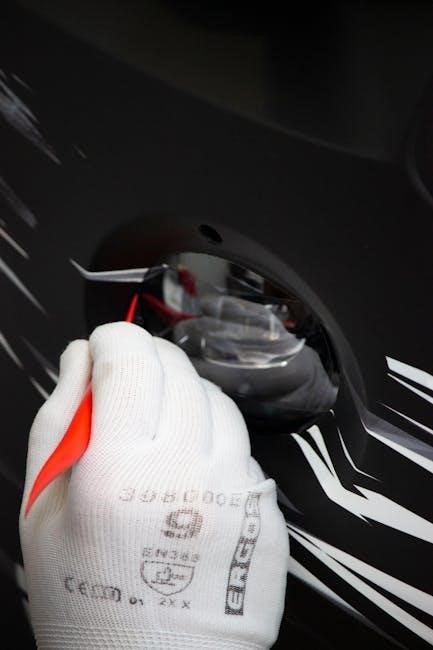
Pre-Installation Requirements
Ensure compatibility with your HVAC system and verify power requirements. Gather necessary tools like screwdrivers and wire strippers. Check for a suitable location and wiring conditions.
2.1 System Compatibility Check
Verify the Honeywell TH5220D1003 thermostat is compatible with your HVAC system, including 2 heat/2 cool configurations, heat pumps, and conventional systems. Ensure wiring matches terminal designations and that the system supports the required power supply. Proper compatibility ensures efficient operation and avoids installation issues.
2.2 Tools and Materials Needed
For installation, you’ll need a screwdriver, wire strippers, pliers, and a drill. Use 18-22 gauge thermostat wire and ensure compatibility with your HVAC system. Additional materials include wall anchors for mounting and a level for proper alignment. Refer to the manual for specific wiring requirements and safety precautions to ensure a secure and efficient setup.

Installation Process
Mount the thermostat, connect wires according to terminal designations, and ensure proper power supply. Follow manual instructions for compatibility and wiring to complete the setup efficiently.
3.1 Thermostat Mounting Instructions
Mount the Honeywell TH5220D1003 securely on a flat wall surface, ensuring proper alignment. Remove the old thermostat, then prepare the wall with screws and anchors provided. Gently pull wires through the wall plate and connect them to the new thermostat. Align the device with the wall plate, securing it firmly. Ensure the thermostat is level and excess wires are pushed back. Refer to the manual for detailed mounting steps and safety precautions.
3.2 Wiring Connections and Terminal Designations
Connect the wires to the appropriate terminals on the Honeywell TH5220D1003, following the terminal designations in the manual. Use 18- to 22-gauge thermostat wire; shielded cable is unnecessary. Ensure the L terminal provides a continuous output for Emergency Heat activation. Verify all connections are secure and match the HVAC system configuration. Double-check wiring to prevent errors and ensure safe operation.
3.3 Power Supply and Disconnect Means
The Honeywell TH5220D1003 requires a 24V AC power supply. Ensure a disconnect means, such as a switch or breaker, is installed per local electrical codes. This ensures safe servicing of the thermostat. The disconnect must be placed between the load and neutral connections to prevent live voltage at the thermostat, adhering to safety standards and regulations for HVAC systems.
Programming and Setup
Configure the Honeywell TH5220D1003 by setting the initial parameters, including heat/cool stages and temperature differential. Use the keypad to navigate through settings and customize your system operation for optimal performance and energy efficiency. Refer to the manual for detailed step-by-step instructions and ensure all preferences are saved properly after setup completion.
4.1 Initial Configuration and Settings
Begin by setting the basic parameters such as system type (heat pump or conventional), heat/cool stages, and temperature differential. Use the keypad to navigate through the configuration menu. Set the desired temperature range and adjust sensitivity settings for precise control. Refer to the manual for default settings and ensure all configurations align with your HVAC system requirements. Save settings to complete the initial setup process;
4.2 Scheduling and Temperature Control
Set up a daily schedule by adjusting the temperature settings for different time periods. Use the keypad to program heat and cool stages, ensuring optimal comfort. Adjust temperature ranges and timing to match your lifestyle. The thermostat allows for precise temperature control, with options to set minimum and maximum limits. Regularly review and update schedules to maintain energy efficiency and consistent comfort levels throughout the day.
Advanced Features and Customization
Advanced features include emergency heat activation and integration with Honeywell zoning panels, allowing for precise temperature control and system customization to meet specific comfort and energy needs effectively.
5.1 Emergency Heat Activation
The Honeywell TH5220D1003 allows emergency heat activation, ensuring consistent heating during system failures. This feature is activated via the L terminal, which provides continuous output when the thermostat is set to Emergency Heat mode. Proper wiring connections, including a common connection from the cooling transformer, are essential for this functionality. This setup enables seamless integration with Honeywell zoning panels, enhancing system reliability and user comfort during emergencies.
5.2 Integration with Honeywell Zoning Panels
The Honeywell TH5220D1003 seamlessly integrates with Honeywell zoning panels, enabling advanced temperature control across multiple zones. This integration requires proper wiring connections, including the L terminal for emergency heat activation and a common connection from the cooling transformer. The thermostat works in tandem with zoning panels to optimize energy usage and provide customized comfort in different areas of the home or building.
Troubleshooting Common Issues
This section covers common issues with the Honeywell TH5220D1003, such as error codes and wiring problems, offering troubleshooting solutions for optimal performance and reliability.
6.1 Diagnostic Error Codes and Solutions
The Honeywell TH5220D1003 displays error codes for system malfunctions, such as E1 for temperature differences or E3 for sensor issues. Solutions include checking wiring connections, verifying temperature settings, and ensuring proper system calibration. Refer to the manual for specific code meanings and step-by-step troubleshooting guidance to resolve issues efficiently and restore optimal thermostat functionality.
6.2 Common Wiring and Connectivity Problems
Common issues include loose wire connections, mislabeled terminals, or incorrect wiring configurations. Ensure all wires are securely connected and match the terminal designations in the manual. Verify compatibility with your HVAC system and check for any damaged or corroded wires. Refer to the installation guide for detailed wiring diagrams and troubleshooting steps to resolve connectivity issues effectively.

Energy Efficiency and Optimization
The Honeywell TH5220D1003 thermostat optimizes HVAC performance, reducing energy consumption through precise temperature control and smart adjustments. It helps users maintain efficiency without sacrificing comfort or convenience.
7.1 Energy-Saving Tips Using the Thermostat
Maximize energy savings with the Honeywell TH5220D1003 by setting optimal temperatures, adjusting settings when away, and utilizing its precise control. Lowering the thermostat by 1-2 degrees can reduce heating costs, while raising it during cooling season saves energy. Regularly maintaining consistent temperatures and using the thermostat’s features effectively enhances efficiency without compromising comfort.
7.2 Optimal Temperature Settings for Efficiency
Set your Honeywell TH5220D1003 to 68°F in winter and 78°F in summer for optimal efficiency. These temperatures balance energy savings and comfort. Lowering the winter setpoint or raising the summer setpoint by 1-2 degrees can further reduce energy use. Consistent settings help avoid unnecessary cycling, prolonging system life while maintaining efficiency and comfort.
Maintenance and Repair
Regularly clean the thermostat, check batteries, and inspect wiring for damage. Replace worn-out parts promptly to ensure optimal performance and extend the product’s lifespan.
8.1 Routine Maintenance and Cleaning
Regular maintenance ensures optimal performance. Clean the thermostat’s display and exterior with a soft cloth. Check and replace batteries as needed. Inspect wiring for damage or wear. Ensure all connections are secure. Refer to the Honeywell TH5220D1003 installation manual for detailed cleaning and maintenance procedures. Routine upkeep helps prevent operational issues and maintains energy efficiency.
8.2 Replacement Parts and Accessories
Replacement parts for the Honeywell TH5220D1003 include battery holders, front covers, and wiring components. Ensure all parts are genuine Honeywell products for compatibility. Refer to the installation manual for part numbers and sourcing instructions. Authentic accessories guarantee proper function and maintain warranty validity. Always consult the manual or contact Honeywell support for verified replacement options.
Disposal and Environmental Considerations
Ensure safe disposal of the Honeywell TH5220D1003 thermostat by following environmental guidelines. Consult the manual or local authorities for proper recycling options and compliant disposal methods.
9.1 Proper Disposal of Old Thermostats
Dispose of old Honeywell TH5220D1003 thermostats responsibly to minimize environmental impact. Check local regulations for electronic waste recycling programs. Remove batteries before disposal and recycle the device through certified e-waste facilities. Proper disposal ensures safe handling of potential hazardous materials and promotes sustainability. Consult your local waste management authority for specific guidelines and recycling options.
9.2 Recycling and Environmental Guidelines
Recycle your Honeywell TH5220D1003 thermostat responsibly to support environmental sustainability. Check local e-waste regulations for authorized recycling centers. Honeywell encourages eco-friendly disposal to prevent hazardous materials from entering landfills. Remove batteries and dispose of them separately. Partner with certified recycling programs to ensure proper handling and recycling of electronic components, aligning with Honeywell’s commitment to environmental stewardship and resource conservation.
Additional Resources and Support
Visit Honeywell’s official website to download the TH5220D1003 manual PDF. For assistance, contact Honeywell customer support at 1-800-468-1502 or visit their support portal for troubleshooting and FAQs.
10.1 Downloading the Honeywell TH5220D1003 Manual PDF
Visit the official Honeywell website to download the TH5220D1003 installation manual PDF. This guide provides detailed instructions for installation, wiring, and troubleshooting. It also includes specifications and compatibility information for optimal setup. Ensure you have the correct model number to access the accurate manual for your thermostat. Refer to the manual for proper installation and operation.
10.2 Contacting Honeywell Customer Support
For assistance with the Honeywell TH5220D1003, contact customer support at 1-800-468-1502 or visit their official website. Representatives are available to address technical issues, repair requests, and general inquiries. This service ensures prompt resolution for any concerns related to your thermostat’s installation, operation, or maintenance, providing reliable support when needed.